Wednesday, June 29, 2011

garlic scape season is really short...want a recipe for white bean & garlic scape dip?

what a treat to find a bunch of garlic scapes in my weekly CSA box.  are you familiar with scapes?  if not, go immediately to your farmer's market and ask for them.  they are a soon-to-flower stalk that grows at the top of the garlic plant from between the leaves.  these "flowers" have to be cut off to ensure the bulb receives the necessary energy required to grow into the garlic we know and love.  this process is sort of like pinching the flowers off herb plants to aid in their growth. i love the clean, organic look of scapes...they curl into very interesting shapes...and make lovely casual floral arrangements which i use for a day or two prior to turning into a delicious treat.

many people discard the garlic scapes when harvesting...if you grow garlic do not let this happen. they are an amazingly tasty vegetable that can be used wherever you use garlic, green onions or chives. they taste like a milder version of fresh garlic with a bit less bite while still retaining tons of flavor. they can be chopped up and added to stir-fry, frittata, pasta or sautéed and added as a topping for pizza or bruschetta. you will find many ways to use...
garlic scapes are in season for only 3-4 weeks...one of the issues you deal with when trying to eat only local, in season, organic food...short harvest time frames. you have to be aware each week of what is ready ...and then snap up the items before the season is over. i ate scapes every day for a week....and wished i had bought more.

if you google garlic scapes, you will find loads of recipes for pesto.  trust me...pick one...any one.  then make it and serve with pasta or spread on toast/bruschetta.  garlic scape pesto is delicious but i did not think the world needed another version....so instead of my pesto,  i decided to share a recipe for a dip made with scapes, white beans, extra virgin olive oil and seasonings.  easy, quick, delicious, healthy and versatile...how great is that?

i made this dip a couple of weeks ago when some friends decided at the last minute to come for drinks...they called and said "we have wine...we know you will have food..so we are coming over".  good friends can do that.  i had all the ingredients for the dip so i grilled some bread and drizzled with olive oil then added olives, preserved lemons, cheese and a crudités platter to the offering.   everyone was happy!    
white bean and garlic scape dip
6-8 garlic scapes, cut in large pieces
1 (15-ounce) can cannellini beans, drained and rinsed

2 tablespoons fresh lemon juice
1/2 cup extra virgin olive oil, plus additional for drizzling
1/2 tsp red pepper flakes
sea salt
freshly cracked black pepper

add the scapes to the bowl of a food processor and pulse until roughly chopped.  add the beans, lemon juice, half the olive oil and the red pepper flakes. pulse until chopped and mixed.  with machine running, slowly pour the remaining oil in through the tube, stopping when you reach your desired texture (i.e. stop when still a bit chunky if you like texture...or keep whirring away until very smooth...whatever you like).  add a pinch each of salt and pepper...taste and adjust seasonings as needed. place in a serving bowl and drizzle with additional extra virgin olive oil.

serve with pita chips, tortilla chips, crackers and/or a crudités platter.  delicious spread on bruschetta.  try as a sandwich spread with roast beef or chicken.

what is your favorite "gone in a blink of an eye" fruit or vegetable?  asparagus? garlic scapes? fava beans?  something else?  please share with me in the comments section...and tell me your favorite way to prepare...

best,
diane

diane padoven
founder/president
napa farmhouse 1885™
"live a green life of style™ "
Follow napafarmhouse on Twitter

do you like us? really like us? then please join our facebook fan page
to receive special offers only available to our preferred customers, please sign up for the mailing list on the right hand side of this post...

Tuesday, June 21, 2011

ecstatic for eggplant? a recipe for grilled, marinated eggplant sandwiches

summer fest starts off this year with eggplant...and i could not be happier.  when i was a kid, my mom used to make eggplant parmigiana...remember the 70's version? thick slices of eggplant dipped in seasoned breadcrumbs and fried?  then layered in a casserole dish with tons of cheese and red sauce?  i thought it was the greatest thing ever.  it wasn't until years later that i ate grilled eggplant and realized the eggplant parmigiana dish did not actually allow you to taste the eggplant.  breadcrumbs, cheese and red sauce yes...eggplant no. you know what?...eggplant is delicious...and a lighter touch is best.    now i grill,  roast, or marinate my eggplant and my "eggplant parmigiana" recipe consists of thinly sliced eggplant baked until tender and then layered in a casserole dish with fresh tomatoes, a little bit of fresh sauce, fresh basil, a sprinkling of cheese and topped with homemade breadcrumbs.  lighter, fresher, delicious...

eggplant belongs to the nightshade family of vegetables, which also include tomatoes, sweet peppers and potatoes. eggplant peel contains an anthocyanin phytonutrient called nasunin. nasunin is a potent antioxidant and free radical scavenger that has been shown to protect cell membranes from damage.  eggplants are a rich source of phenolic compounds that function as antioxidants. eggplant also contains many vital nutrients and are low in calories as illustrated in the following chart:

(all nutrient facts and chart courtesy whfoods.com)
so eggplant is delicious and healthy...what could be better?

one of my favorite summer sandwiches includes grilled marinated eggplant.  i use a technique i learned from my twitter friend judy witts francini a.k.a davina cucina...salting the sliced eggplant to remove the bitterness and avoid soaking up a ton of oil.  then you simply grill and marinate in a mixture of e.v.oo, garlic, red pepper flakes and black pepper.  when you are ready to make the sandwiches, you will use that delicious, flavorful oil to brush on the bread prior to gilling.  imagine golden brown toasted bread, garlicky spicy eggplant, melted cheese and fresh basil.... amazingly good and easy to make.  you will serve this dish all summer!

grilled eggplant slices marinating in the e.v.o.o. mixture

grilled marinated eggplant sandwiches
(note, gilling times are approx. depending on how hot your coals are...experiment the first time keeping careful watch to see how long it takes you)

1 globe eggplant
sea salt
1 cup extra virgin olive oil
6 cloves garlic, thinly sliced
1-2 tsp red chili pepper flakes
fresh cracked pepper
sourdough or french boule or loaf
fresh mozzarella cheese, sliced
fresh basil
(optional, fresh heirloom tomatoes in season)

cut eggplant into slices approx 1 inch thick.  place in a large colander and sprinkle generously with sea salt.  let sit for 1-2 hours. 
prepare grill.  i prefer wood charcoal for this recipe, but a gas grill works well also. ( alternatively, you can make this using a grill pan indoors.)

use a towel to blot off all the liquid which accumulates on the eggplant (it is very bitter).  brush slices with olive oil to prevent burning and grill approx 4 minutes per side.  remove from grill and layer in a baking pan.  cover eggplant with remaining olive oil and sprinkle with sea salt, crushed red pepper (i use 2 teaspoons, but go with one if you want it less spicy), garlic and cracked black pepper.  allow to marinate for a minimum of 1 hour...but longer if possible...up to 4 hours.


cut bread into slices approx 1 inch thick.  create sandwiches by layering a couple slices of eggplant and 1 slice mozzarella cheese between two slices of bread.  brush some of the olive oil from the eggplant dish onto the outside of both sides of each sandwich.  grill 3-4 minutes per side, just until the bread is golden brown and the cheese has begun to melt.  remove from grill, carefully remove the top piece of bread (sandwiches will be hot) and add some fresh basil and a slice of tomato if using.  replace the bread slice and serve immediately.
here is my tip regarding using the grill for the eggplant sandwiches.  i make this the same day i grill chicken or a large piece of meat.  i grill the eggplant first and start the marinating process. then, i grill the chicken or meat...when finished, the coals are ready for the sandwiches.  we either have a big feast, or i serve the sandwiches immediately and have barbecued chicken or steak or ribs prepared for a few days worth of meals. 
now it is your turn to participate in summer fest. simply leave your eggplant tip or recipe or favorite links in the comments below, and then go visit foodnetwork.com and do the same same.

the cross-blog event idea works best when you leave your recipe or favorite links (whether to your own blog or someone else’s) at all the participating blogs. yes, copy and paste them everywhere! that way, they are likely to be seen by the widest audience. everyone benefits, and some pretty great dialog starts simmering.  have fun!

participating blogs:

Food2: Around the Eggplant in Eight Ways
FN Dish: Grilled Eggplant Recipes
What’s Gaby Cooking: Eggplant Chips with a Cilantro Cashew Dipping Sauce
Taste with the Eyes: Indian Eggplant, Lemon Confit, Garlic, Thai Basil
Sassy Radish: Eggplant Caviar
The Little Kitchen: Roasted Zucchini and Eggplant Lasagna
Big Apple Nosh: Baba Ganoush

best,
diane

diane padoven
founder/president
napa farmhouse 1885™
"live a green life of style™ "


Follow napafarmhouse on Twitter

do you like us? really like us? then please join our facebook fan page


to receive special offers only available to our preferred customers, please sign up for the mailing list on the right hand side of this post...

Friday, June 17, 2011

summer fest is almost here!

yeah!  heard from my twitter friend deb puchalla today....summer fest starts next week.  deb has the coolest job ever.  she currently is editorial director of foodnetwork.com, food.com, food2.com and cookingchanneltv.com.  when i met her she was an editor with martha stewart living.  deb, along with margaret roach another former "martha" person, started
summer fest a few years ago.

 it works like this...each week a summer fruit or vegetable is selected and bloggers all over the world post recipes using that ingredient.  they post their recipe on their blogs and as many other participating bloggers blogs as possible.  they also encourage their readers to share their favorite tips, dishes or ways to eat/grow the item.  you end up with a massive amount of ideas...perfect during the growing season when you might have too much produce...too little inspiration.  it has become of of my favorite parts of summer. 

my first contribution was in july 2008 and the topic was zucchini.  we do this each week until summer ends.  last year we kept the fun going until thanksgiving and switched the name to fall fest after labor day.


so here we go! next week's selection is eggplant.  do you want to participate?  read more at  foodnetwork.com.  if you are a fellow blogger, post an eggplant recipe on wednesday...if not, just check back here for my post....and feel free to share your favorite eggplant tips in the comments section...

summer fest 2011...this is going to be good...

best,
diane

diane padoven
founder/president
napa farmhouse 1885™
"live a green life of style™ "

Follow napafarmhouse on Twitter

do you like us? really like us? then please join our facebook fan page

to receive special offers only available to our preferred customers, please sign up for the mailing list on the right hand side of this post...

Tuesday, June 7, 2011

want a recipe for rhubarb & strawberry crumble?


so...what is the difference between a crisp and a crumble?  summer is approaching (although here in napa you would never know it...it has been cold, cloudy and rainy for weeks!) and crisps/crumbles are the perfect, easy, delicious way to prepare the luscious fruit grown at this time of year.   but what is the difference?  definitions vary, but most agree that both desserts start with a bottom layer of fruit, but their toppings are a little bit different. crisp toppings are a mix of butter (or, in my case, olive oil), sugar, flour,  oats and sometimes nuts. crumbles include a butter (e.v.o.o.), flour, sugar mixture called streusel. the three ingredients are mixed until crumbly and then cover the fruit. the finished products are very similar, but crisps have a higher proportion of fat to flour so are usually crisper and a bit richer.  crumbles are more cake-like.  both are delicious.

i posted my crisp recipe last fall and used apples & pears . today i am sharing my "kind of healthy" crumble.  regular readers know i have been on a quest this year to take traditional recipes and make them a bit healthier.  i think i have been brainwashed by my friend laura's quarterly cleanses and want my body to feel good after consuming delicious food...(i.e.  not bloated, stuffed, heavy, too full)...  emphasize delicious in that last sentence.  it does me no good to create a healthy recipe if it tastes bad...or even marginal.  i need to love it or am not satisfied.  this crumble meets that criteria.

i used spelt flour instead of the more traditional white flour.  spelt flour is an ancient whole grain with high water solubility.  this allows its vital nutrients to be absorbed into the body very quickly. it also adds a bit of a nutty taste which i think works really well in crumbles. and, although it is NOT gluten free and therefore not suitable for people with celiac disease, many people sensitive to gluten report they can tolerate spelt flour.   my other substitutes are agave nectar for sugar, extra virgin olive oil for butter and, because i like the taste better, instant tapioca in place of cornstarch or flour to thicken the fruit juices.

it embarrasses me a bit to admit that i have never cooked with rhubarb.  growing up, i don't remember even eating it.  so it was a terrific surprise to find 8 stalks in my csa box last week.  rhubarb and strawberries are so often paired together that i decided this would be the perfect combo for my first attempt at using this fruit. i have heard rhubarb is very bitter so strawberries naturally add a bit of sweetness to balance everything out.  guess what?  i now am quite the rhubarb fan....how did i miss this my whole life?  rhubarb is 95% water and is rich in potassium, vitamin c, dietary fiber and calcium. one cup of chopped rhubarb contains approx 26 calories.  how great is that?  i can convince myself that leftover crumble is a healthy breakfast option  ha!  actually, once in a while, it really is....  so enjoy after dinner, as an afternoon treat...or breakfast...i think even laura would approve....(but probably without the ice cream)


rhubarb and strawberry crumble

topping
2 1/2 cup spelt flour
2 teaspoons baking powder
1/4 cup agave nectar 
zest of one lemon
3/4 cup extra virgin olive oil

filling
8 stalks rhubarb, chopped into 1-inch pieces
2 quarts strawberries hulled and quartered
juice of one lemon
3/4 cup agave syrup
4 tablespoons instant tapioca
pinch of sea salt

preheat oven to 375°F.  in a mixing bowl combine spelt flour, baking powder, agave, lemon zest and olive oil. mix well.  you will have a dense dough.  set aside while preparing the filling.

add rhubarb, strawberries, lemon juice, agave, tapioca and a pinch of sea salt in a 12 x 8 baking dish. (my oval dish is approx the same size).  stir to ensure ingredients are well mixed. using your fingers, break topping into small pieces and sprinkle over fruit . cover fruit with topping. place crumble on a foil lined baking sheet (to capture any drips), and bake until crumble topping is brown and crunchy and fruit is bubbling. (approx 40 to 50 minutes.)
let cool for a minimum of 35 minutes to allow fruit to gel.  serve warm, room temperature or cold with your favorite vanilla ice cream

do you have favorite rhubarb recipes?  please share them in the comments section.  i am hoping for more rhubarb stalks in my csa box during the next few weeks.... what should i do with them?

best,
diane

diane padoven
founder/president
napa farmhouse 1885™
"live a green life of style™ "

do you like us? really like us? then please join our facebook fan page

Follow napafarmhouse on Twitter

to receive special offers only available to our preferred customers, please sign up for the mailing list on the right hand side of this post...

Friday, May 27, 2011

quinoa...where have you been all my life?

i would guess that three years ago most people in this country had never heard of quinoa.  now it has become the darling of foodies.  i see it everywhere...recipes in food magazines, on the menus of many restaurants, available at most supermarkets...and i must confess that i am a massive fan.   quinoa is delicious...and really good for you. what could be better?  i did a bit of research to understand exactly what quinoa was....thought it was a type of rice or grain...only to discover that it was actually a seed.  the more i read...the more i am impressed by this "super food".  


wholehealthmd.com describes quinoa this way"

"Nutritionally, quinoa might be considered a supergrain--although it is not really a grain, but the seed of a leafy plant that's distantly related to spinach. Quinoa has excellent reserves of Protein, and unlike other grains, is not missing the amino acid lysine, so the protein is more complete (a trait it shares with other "non-true" grains such as buckwheat and amaranth). The World Health Organization has rated the quality of protein in quinoa at least equivalent to that in milk. Quinoa offers more iron than other grains and contains high levels of potassium and riboflavin, as well as other B vitamins: B6, niacin, and thiamin. It is also a good source of magnesium, zinc, copper, and manganese, and has some folate (folic acid)."

since i am always looking for ways to add protein and iron to my diet, this is a major plus for me. quinoa is gluten free, easy to prepare, low in calories...and very versatile. quinoa comes in different colors ranging from ivory to tan to pale yellow to red to black.  they all taste similar but i think the darker the color, the richer the taste.  i am partial to red quinoa...but i like them all.

use quinoa to make salads, pilafs, stuffing, cooked hot for breakfast (like oatmeal), in baked goods...and on and on and on.

our last book club meeting had a salad theme for dinner.  8 members, so 8 different salads.   all delicious.  i decided to make a greek quinoa salad using red quinoa, sweet white onions, kalamata olives, english cucumber, red bell pepper, italian parsley and feta cheese tossed in a red wine vinegar vinaigrette.  so good!  i made way too much so, in addition to multiple servings at book club, we had it for lunch and dinner numerous times...including a picnic lunch with four friends (grilled chicken and the salad!)....another benefit is that it holds well so you can make it in advance.

so...it is the start of the memorial day weekend.   picnics, barbecues, pool parties, days at the beach.  need a salad suggestion?  quinoa would be perfect!

greek quinoa salad
use organic produce if you can
2 cups red quinoa
4 cups water
1/2 sweet white onion diced
1 cup kalamata olives sliced
1 english cucumber, diced
1 red bell pepper, diced
1 cup fresh italian parsley, chopped
pinch sea salt
freshly cracked black pepper
1 cup crumbled feta cheese


red wine vinaigrette
1/4 cup red wine vinegar
1/4 cup seasoned rice vinegar
3/4 cup  extra virgin olive oil
2 tablespoons dijon mustard
1 clove minced garlic
1 teaspoon fresh oregano, minced
pinch sea salt
combine all vinaigrette ingredients in jar with tight fitting lid. (i use mason jars) shake until thoroughly combined.

combine quinoa and water in medium saucepan.  bring to a boil, reduce heat, cover and let simmer until water has evaporated (about 20-25 minutes).  remove from heat and allow to cool. fluff with fork. place cooled quinoa in a large bowl.  add 1/2 cup vinaigrette and stir to incorporate.  add all vegetables and herbs and stir to combine.  add another 1/2 cup vinaigrette and the feta cheese. taste before adding seasonings because the feta is pretty salty.  season to taste.  add additional vinaigrette if desired.  serve cold or at room temperature.
(note...this makes a lot of salad...feel free to cut in half if you wish...you can even make just a qtr recipe...it divides easily)

happy memorial day everyone...do you make quinoa?  how do you prepare?

best,
diane

diane padoven
founder/president
napa farmhouse 1885™
"live a green life of style™ "

Follow napafarmhouse on Twitter


do you like us? really like us? then please join our facebook fan page

to receive special offers only available to our preferred customers, please sign up for the mailing list on the right hand side of this post...

Thursday, April 28, 2011

what is caramel chocolate matzo crunch? (answer...an addictive, can't-stop-eating, treat)

long story short...i was asked this year to prepare a Jewish Seder Meal.  i am not Jewish, nor had i ever attended a Seder, so i did a ton of research to ensure everything was authentic and proper in addition to tasting delicious.  i knew that dairy and meat were forbidden and that leavened grains were also not allowed, so extra virgin olive oil and almond milk were used in the garlic mashed potatoes, potato starch was used to thicken the gravy, matzo stood in for bread during dinner...and i followed instructions from about.com for preparing the seder plate.

dessert was a bit more of a challenge.  no flour or dairy?  what to make?   i did some more research and came up with a number of options.  then, a few days before the meal, my twitter/facebook friend davina cucina commented on a post from the blogger/writer david lebovitz about a recipe for matzo covered with caramel and topped with chocolate.  oh man!  this delicious sounding treat promised easy prep, quick and effortless execution, crowd pleasing results....i was sold.  i checked google and saw a number of recipes...all pretty similar....all promising the same results.  eureka!  i found my dessert.

ok...so when i say this was a hit, i am under emphasizing the reaction.  the dinner guests loved it.  i mean seconds, thirds, fourths loved it.  i mean, "can i take some home?" loved it.  a couple of people actually gathered up all the crumbs to " use as a topping over ice cream".  trust me...you must make it....  soon.  you will make it often.  since matzo is available year round, this may become your secret weapon for easy-but-impressive desserts.

are you sold yet?  the recipe is as easy as this....cover the bottom of a rimmed baking sheet with a single layer of matzos.  pour some hot caramel sauce (melted butter/margarine and brown sugar with a bit of salt and vanilla) over the matzos.  bake for 15 minutes.  remove from oven and top with chocolate chips (i used dark chocolate to avoid dairy, but semi-sweet works well too)  let the chips sit for a few minutes to begin melting and then use an off-set spatula to spread the chocolate over the caramel. add toasted nuts if you wish... let harden, break into pieces...serve.   i made half plain chocolate, half topped with toasted almonds.  both were loved...but the almond topped ones were the fav for my group.

as i said, there are a ton of variations of this recipe on web searches...all very similar...but i liked david lebovitz's the best, so that is the one i used.  he suggests topping the plain ones with flaked sea salt...that is how i will make it next time.  he also notes that any type of cracker would work if you don't want matzos...even gluten free.  i will post his recipe here...but i suggest you check out his site to read his descriptions.  if i have not sold you...he will.  plus, you should read his blog often anyway...he is brilliant! 

the recipe below makes about 30 pieces of toffee.  i was cooking for 100, so i made 8 batches.  (actually, i made one big batch and just multiplied everything by eight. worked beautifully, so increase this to whatever quantity you need.)  enjoy...


Chocolate Covered Caramelized Matzoh Crunch
from David Lebovitz
(red font, my notes)

4 to 6 sheets unsalted matzohs (look for boxes marked "for passover" during that time...otherwise regular matzos will do)1 cup (230g) unsalted butter, cut into chunks (or vegan margarine during passover, i use earth balance)1 cup (215g) firmly-packed light brown sugar
big pinch of sea salt
1/2 teaspoon vanilla extract
1 cup (160g) semisweet chocolate chips (or chopped bittersweet or semisweet chocolate)

1 cup (80g) toasted sliced almonds (optional)

1. Line a rimmed baking sheet (approximately 11 x 17″, 28 x 42cm) completely with foil, making sure the foil goes up and over the edges. Cover the foil with a sheet of parchment paper.
Preheat the oven to 375F (190C).
2. Line the bottom of the sheet with matzoh, breaking extra pieces as necessary to fill in any spaces.
3. In a 3-4 quart (3-4l) heavy duty saucepan, melt the butter and brown sugar together, and cook over medium heat, stirring, until the butter is melted and the mixture is beginning to boil. Boil for 3 minutes, stirring constantly. Remove from heat, add the salt and vanilla, and pour over matzoh, spreading with a heatproof spatula.
4. Put the pan in the oven and reduce the heat to 350F (175C) degrees. Bake for 15 minutes. As it bakes, it will bubble up but make sure it’s not burning every once in a while. If it is in spots, remove from oven and reduce the heat to 325F (160C), then replace the pan.
5. Remove from oven and immediately cover with chocolate chips. Let stand 5 minutes, then spread with an offset spatula.
6. If you wish, sprinkle with toasted almonds (or another favorite nut, toasted and coarsely-chopped), a sprinkle of flaky sea salt, or roasted cocoa nibs.

Let cool completely, the break into pieces and store in an airtight container until ready to serve. It should keep well for about one week.

do you have a favorite, fast, easy go-to dessert recipe?  please share in the comments section of this post.

best,
diane

diane padoven
founder/president
napa farmhouse 1885™
"live a green life of style™ "


Follow napafarmhouse on Twitter


do you like us? really like us? then please join our facebook fan page

to receive special offers only available to our preferred customers, please sign up for the mailing list on the right hand side of this post...

Friday, April 15, 2011

who wants our "farmhouse french toast" recipe?

i am such a sunday morning breakfast fan.  the rest of the week i usually start my day with a smoothie...or oatmeal...or whole wheat toast and fruit.  but sundays just do not seem complete without something a bit more BREAKFAST like.  pancakes or waffles.  biscuits and eggs.  omelets.  probably because i grew up in southern california, mexican food breakfasts like huevos rancheros, or scrambled eggs with onions, cheese and peppers (and loads of salsa) served with beans and tortillas are favorites of mine.  i just love waking up to the sunday paper, the sport of the season on tv...football, basketball or baseball...and a wonderful breakfast.  when it is sunny and warm enough to eat outside...even better.

french toast is one of those sunday breakfast foods that fit the bill perfectly.  quick and easy, delicious, made from ingredients i usually have on hand.  the key for me is thick, dense bread.  i want my toast crunchy...and, because i don't like it overly sweet, i love the flavor of sourdough.  i buy a loaf of unsliced bread on saturdays....use some saturday night with dinner...and then have the rest for sunday breakfast.  the day old bread has just the texture needed for the french toast...and i can slice it as thick as i want.

the key, as always, is to use the freshest, best-quality-possible ingredients.  i use fresh, organic, free-range eggs from hudson ranch,  bread from model bakery here in napa, organic seasonings & fruit and, because i want it to not only taste delicious but be healthy, i use almond milk and just a tiny bit of agave nectar in the egg mixture...no refined sugar.  as far as the maple syrup goes?  i only use a little bit, but you are on your own for this one!

ok..it is friday as i write this...plenty of time to get your food shopping in for the weekend.  maybe french toast on sunday morning?  let me know what you plan to eat for breakfast... 
farmhouse french toast
(serves 4)
ingredients
1 loaf dense sourdough bread, unsliced
2 large eggs
1/4 cup vanilla almond milk, unsweetened (or regular milk if you prefer)
1 tsp agave nectar
1 pinch kosher salt
1/4 teaspoon ground cinnamon
1/8 tsp ground nutmeg
extra virgin olive oil
maple syrup
strawberries, blueberries, peaches or whatever fruit you like

using a serrated knife, cut 4 slices, 1 inch thick each, from the loaf of bread. (reserve the rest for another use). cut each piece in half diagonally. set aside.
in a shallow dish, whisk together the eggs, almond milk, agave, salt and spices. (i use a baking dish).


add enough olive oil to lightly cover the bottom of a large skillet and heat oil until hot...but not smoking.
dip each slice in egg mixture using a fork to turn ensuring both sides are coated.  add to skillet and cook until golden brown on both sides.  serve immediately with maple syrup and fruit.

happy weekend,
diane

diane padoven
founder/president
napa farmhouse 1885™
"live a green life of style™ "


Follow napafarmhouse on Twitter


do you like us? really like us? then please join our facebook fan page

to receive special offers only available to our preferred customers, please sign up for the mailing list on the right hand side of this post...

Monday, April 4, 2011

want the recipe for martha's meyer lemon pastry?

photo by mara alderman
ok...if you subscribe to martha stewart living you already have this recipe...but if not, keep reading.  (actually, please keep reading either way!).  i rarely follow recipes exactly...always feel the need to tweak a bit.  but in this case, no tweaks.  not needed.  perfect as is.  so i thought i would tell you about it and post the recipe. trust me, the meyer lemon pastry is easy, effortless and delicious.  plus it looks impressive so it is a perfect choice for entertaining and/or a potluck.

speaking of potlucks.  my friend caitlin moved back to canada last summer because her green card expired.  cait was a founding member of our book club and is a very good friend.  when i heard she was coming to napa last month to celebrate her birthday, i was thrilled.  her birthday party was held in the ever-so-cool design studio of another good friend, richard.  he decided the party would be potluck and let everyone pick whatever they wanted to bring.  our meyer lemon harvest was huge this year and i know caitlin loves lemon desserts so the category was an easy decision.  i assumed there would be some sort of birthday cake so pie or tart seemed like a good addition to the assortment.  in the "perfect timing" department, i was paging through the april 2011 martha stewart living magazine and discovered the beautiful and yummy tart on page 127.  potluck item solved!

making the tart is as simple as poaching some meyer lemon slices in a sugar syrup, arranging them on puff pastry and then baking. honestly, the most time consuming part is slicing the lemons.

the recommended store bought puff pastry is from a company called dufour pastry kitchens and their product is delicious, 100% natural and full of real butter.  homemade puff pastry is wonderful...but really, really, really time consuming.  dufour is a time saving solution because the product is of such high quality. (as always, the ingredients really make the difference). their website states they will ship in 24 hours...but i buy mine at whole foods.

“Like Many Chefs I use Dufour, an all butter brand of Puff Pastry sold in specialty markets” – Wylie Dufresne – The New York Times


“We buy Pastry Shells from Dufour Pastry Kitchens – They’re phenomenal and we couldn't’t possibly be bothered to bake our own.” Serena Bass – Food & Wine

of course it was pouring rain the night of cait's party.  my only concern was getting the tart there in one piece.  so i forgot to take pictures.  happily, cait sent me some she took with her iphone...so not perfect but you will get the idea.  to see a beautiful photo, check out the one in the magazine martha stewart living or click here . (the photo in the magazine is stunning).  make this tart now while meyer lemons are in season...you really must. 


Martha Stewart Living, April 2011

Meyer Lemon Pastry
Yield
Makes one 11-by-14-inch tart; serves 9 .Add to Shopping List


Ingredients
2 cups water
1 cup granulated sugar
6 Meyer lemons, thinly sliced
1 package frozen puff pastry (14 oz), preferably Dufour, thawed
All-purpose flour, for surface
1 large egg, lightly beaten, for egg wash
Fine sanding sugar, for sprinkling
1 cup cold heavy cream
1/2 vanilla bean, split and scraped, pod reserved for another use


Directions
1.Bring water and granulated sugar to a simmer in a medium saucepan over medium heat. Cook, stirring, until sugar dissolves, about 5 minutes.
2.Cut out a circle of parchment the size of the saucepan. Add lemons, and cover with parchment. Simmer gently until lemons are soft and translucent, about 1 1/2 hours.
3.Remove lemons from syrup, and transfer to a wire rack set over a baking sheet to drain. (MY NOTE...reserve the syrup)
4.Preheat oven to 400 degrees. Roll out puff pastry on a lightly floured surface to an 11-by-14-inch rectangle. Lightly score a 1-inch border around edges using a sharp paring knife. Brush entire surface of dough with egg wash, and sprinkle with sanding sugar. Freeze until firm, about 30 minutes.
5.Bake pastry until golden, 22 to 24 minutes. Let cool completely.
6.Meanwhile, whisk heavy cream and vanilla seeds with a mixer on medium speed until soft peaks form.
7.Top pastry with lemon slices. Serve with vanilla cream.

Cook's Note
Lemons can be refrigerated in syrup for up to 1 week.

(i served the tart with a bowl of whipped cream on the side.  i also decided to not waste the lovely meyer lemon syrup reserved from the lemon slices.  i cooked it down until it gelled and then served it in a bowl alongside the cream.  i recommended people put a dollop of cream on each tart slice and then top with a bit of the lemon gelée...amazingly good)


best,
diane

diane padoven
founder/president
napa farmhouse 1885™
"live a green life of style™ "

Follow napafarmhouse on Twitter
do you like us? really like us? then please join our facebook fan page

to receive special offers only available to our preferred customers, please sign up for the mailing list on the right hand side of this post...

Tuesday, March 22, 2011

what in the world is "cheapie dessert"? and a recipe for homemade organic cake mix

as always, it is impossible for me to just answer the question.  i need to tell you a story...so...here goes...

last week was our book club meeting.  i have told you about this group many times...we get together each month to discuss the selected book (we really do discuss the book), but the emphasis always seems to be on eating, drinking, talking and laughing.  this month we read a visit from the goon squad by jennifer eagan.  our hostess, my friend rachelle, sent the following message regarding the food theme:

"To fit in with the "time is a goon" theme, I thought it would be fun if we each brought a dish that played a significant role in either your childhood or in your family's history. OR, if that stumps you, bring something that you would like to make a significant part of your culinary future."

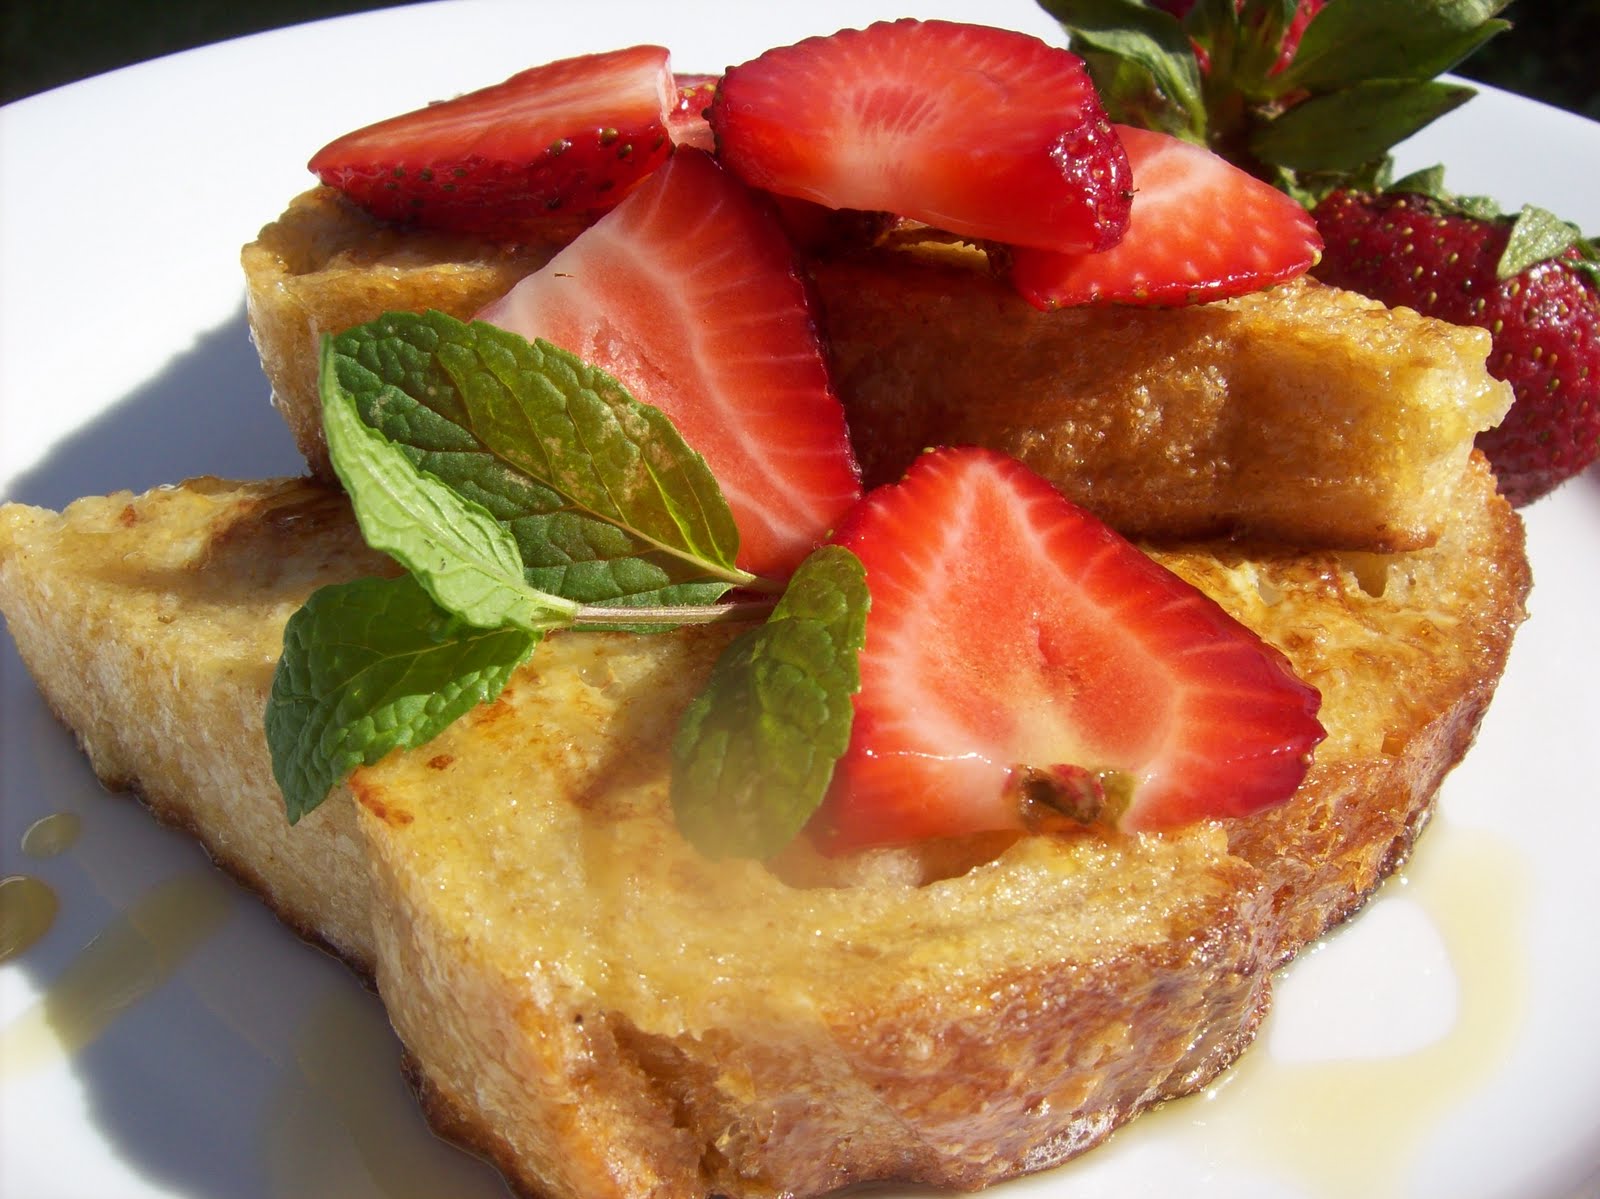
photo courtesy ashley nicole teplin


so i thought about all the dishes my mom is known for and for some reason decided it was time to immortalize her "cheapie dessert".  you would have to know my mom to understand the significance of the name.  let's just say my mom loves deals...and specials...and sales...and coupons.  oh my!  it is not like she is cheap...she is one of the most generous people you will ever meet.  my sisters and i have to fight with her to pay for a meal...we never win.  but tell her about a sale...and her eyes light up.  it is a running joke in my family.  i swear, you could be anywhere in the world with my mom and she will suggest a restaurant for dinner by saying "i just happen to have a coupon for buy one, get one".  she has two freezers and they are always full because she cannot pass up a special at the market.

so, anyway, back to the dessert.  i just found out by prepping for this story that the recipe is actually called dump cake (what a bad name!) and that it is pretty famous.  i had no idea.  when my sisters and i were really little, our next door neighbor mr hartzler taught my mom to make a version of the dessert i am going to share with you...but he never told her the name and we all assumed he invented the concoction.  i have since learned it is called "dump cake" because you dump cherry or apple pie filling into a baking dish, top it with a box of dry cake mix, drizzle a stick of melted butter over the top and bake for a hour.   i know it sounds weird and bad but everyone loves it. 

my mom insisted i tell you that she made it because "in those days you could buy cake mix on sale for 79 cents a box and pie filling for 39 cents so it was really cheap to make".  hence the "cheapie dessert" moniker.  as she says, "it is now much more expensive to make, but people love it so i keep making it".  and, i must admit, it is true...people love it.  i have memories of my now almost 15 yr. old nephews asking for "heapie dessert" when they were two because they couldn't quite pronounce the c.  my mom usually makes everything from scratch...and her cakes, cookies, cream puffs and brownies are amazing...but the "cheapie dessert" remains a mainstay. i think it is because it is so fast and easy.

so...with a name like "cheapie dessert", i knew it would be perfect for book club.  but i decided to give it the napa farmhouse 1885 treatment.  my goal was to reinvent this dish and make it healthy while retaining its easy, fast and delicious reputation.  the fruit part was a no brainer...i make pies all the time, so a mixture of organic apples, with organic citrus zest/juice, seasonings and agave nectar was the easy part.  the cake mix was a bit trickier because i honestly didn't know what was IN cake mix.  after walking the baking aisles of the grocery store and studying the ingredients of a number of brands it seemed like...once you eliminated all the preservatives...the mix was flour, salt, sugar, baking powder and fat.  so i experimented with proportions until i came up with a blend that i really like.  to keep it "cleanse friendly" i have been using vegan "buttery" sticks...i like the brand "earth balance", but regular butter works just as well.  best of all you can actually use this to make cakes!!  but, today..."cheapie dessert"

when i told my mom about the revisions i made to her recipe she said, "diane you are pushing my buttons".  when i told her my next experiment was to tweak it to use extra virgin olive oil and cornmeal with a blueberry filling she said "now you are really pulling my buttons" ?? :)  but don't you think that sounds good?

so...to wrap up this long tale...book club girls loved the dessert, i have a blog story and the world now knows about "cheapie dessert"...  success!  oh, and try the recipe...it really is delicious...kind of a cross between a crisp and a cobbler.  (and my version is not very expensive either...serves 10...maybe not "cheapie"...but reasonable)

did you grow up eating dump cake?  if so, please tell me how you or your mom make it....


connie's "cheapie dessert" my way

cake mix topping
2 1/2 cups white whole wheat flour
1 tsp salt
1 tbsp + 1 tsp baking powder
1 cup organic sugar
1/2 cup agave nectar
1/4 cup vegan "butter", room temperature and cut into small pieces

filling
3 lbs organic apples (i used both granny smith & suncrisp), peeled and cut into 1/2 inch slices
zest of one meyer lemon + 2 tbsp juice
zest of one orange + 2 tbsp juice
1/2 cup agave nectar
1 1/2 tsp cinnamon
1/2 tsp chinese 5 spice powder

1/2 cup vegan "butter", melted
1/2 cup grapeseed oil

preheat oven to 350 degrees.  butter (1 use vegan) a 2 qt shallow baking dish and set aside.

make the cake mix:  combine the flour, salt and baking powder in a mixer or food processor and mix just to combine.  add the sugar and agave nectar and pulse a couple of times.  add the "butter" and pulse until thoroughly incorporated in the the dry mix.  set aside.

make the filling:  add the apples to a large bowl.  add the lemon and orange zest and juice and the agave nectar and stir to combine.  add the cinnamon and chinese 5 spice powder and stir until mixed.

pour the apple mixture into the prepared baking dish.  using a large spoon scatter the cake mix topping over the apple mixture until the entire top is covered.  you want about 1/2 inch of cake mix topping.  **NOTE, you will have leftover mix, save for another cheapie or for baking a cake**,  drizzle the melted butter over the top of the cake mix.  drizzle the grapeseed oil over the butter. 

place on rimmed baking sheet and bake for 1 hour, or until topping is golden brown and apples are bubbling.  let sit 15 minutes and serve hot, warm or room temperature.  delicious as is...even better with ice cream.  (note, i have been eating ice cream make with coconut milk and sweetened with agave nectar.  still in the "healthy" catagory...and amazingly good.  i like the brand luna & larry's organic coconut bliss.)  or just use your favorite organic ice cream....

with the best intentions, i brought home a piece of the dessert to photograph the next morning.  i am so not a professional photographer and need the sun for halfway decent photos.  i came into the kitchen to find peter eating the "cheapie dessert" for breakfast...he loved it!  happy about that...but, sadly, no photos of cut pieces for the blog.  if you make the dessert and decide to photograph the filling or a piece of the dessert...please send me a copy and i will add to this post :)

happy spring everyone and, mom...i love you!

best,
diane

diane padoven
founder/president

napa farmhouse 1885™
"live a green life of style™ "

do you like us? really like us? then please join our facebook fan page
Follow napafarmhouse on Twitter

to receive special offers only available to our preferred customers, please sign up for the mailing list on the right hand side of this post...